Disclaimer: I am not responsible if you mess up your computer. Proceed at your own risk!
Having installed Window 7 recently, I wanted to install my old games and see if they still worked. After several hours of installing, patching, uninstalling, reinstalling, tweaking and hair pulling I finally have Black & White working flawlessly on Windows 7 ultimate 64 bit.
Black & White came out in March of 2001, before Windows XP was released. As it turns out, I had the same problems trying to get this game to work in Windows XP that I had in Windows 7. Therefore, this guide should suffice for a Windows XP or Windows Vista install, but I will be referring to Windows 7.
If you’ve already tried installing the game and have been met with problems, I highly suggest you uninstall everything related to Black & White and start from scratch. This includes uninstalling the game, deleting the folder where you installed Black & White and removing any Windows registry keys that were left behind by the uninstaller.
I’m going to assume you know your way around regedit. If you don’t, you have a lot of reading to do.
If you are on a 32 bit system, you’ll want to delete the following registry keys:
HKEY_CURRENT_USER\Software\Lionhead Studios Ltd\Black & White
HKEY_LOCAL_MACHINE\SOFTWARE\Lionhead Studios Ltd\Black and White
HKEY_LOCAL_MACHINE\SOFTWARE\Lionhead Studios Ltd\Black and White Clan Patch
HKEY_LOCAL_MACHINE\SOFTWARE\Lionhead Studios Ltd\Black and White Patch
HKEY_USERS\S-1-5-21-2309910519-2795697514-4011825439-1000\Software\Lionhead Studios Ltd\Black & White
If you are on a 64 bit system, you’ll want to delete the following registry keys:
HKEY_CURRENT_USER\Software\Lionhead Studios Ltd\Black & White
HKEY_LOCAL_MACHINE\SOFTWARE\Wow6432Node\Lionhead Studios Ltd\Black and White
HKEY_LOCAL_MACHINE\SOFTWARE\Wow6432Node\Lionhead Studios Ltd\Black and White Clan Patch
HKEY_LOCAL_MACHINE\SOFTWARE\Wow6432Node\Lionhead Studios Ltd\Black and White Patch
HKEY_USERS\S-1-5-21-2309910519-2795697514-4011825439-1000\Software\Lionhead Studios Ltd\Black & White
Now it’s time to get to business. Pop your Black & White disc in your optical drive and start the installation. You can install the game anywhere you want. I have a separate hard drive just for games, so I installed to E:\Black & White. At the end of the installation, it will ask you (among other things) if you want to play the game–select no.
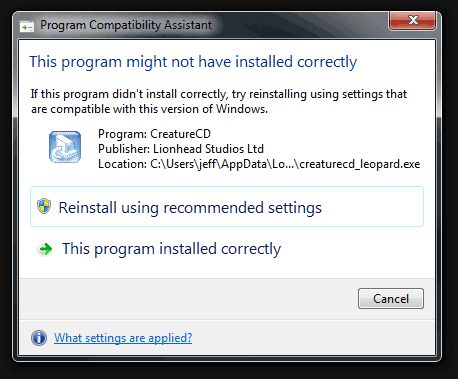
Now is a good time to install any add-ons you wish to use. Note that after each add-on you install, Windows 7 will start the Program Compatibility Assistant asking you whether or not the program installed correctly. You can select this program installed correctly for each.
I recommend getting the four additional creatures; the leopard, the mandrill, the gorilla and the horse as well as the villager banter add-on. You can download the football add-on now too, but you can’t install it until after you patch the game.
Before you go patch crazy and install the latest one, let me tell you what I found in my research. There were a total of three patches released, patch 1.1, patch 1.2 and patch 1.3. Patch 1.3 only adds support for the P5 glove. If you happen to have one of these, then you’ll want to get patch 1.3 but if you don’t you’ll want to stick with patch 1.2. In theory, patch 1.3 includes all the fixes and additions from both patches 1.1 and 1.2 and patch 1.2 includes the fixes from patch 1.1. this means you should be able to just install the patch for the final target version you want, but I had some problems that I think were related to the patch not quite installing correctly. There is no harm in installing each patch individually, so I strongly recommend that you install patch 1.1, then patch 1.2 immediately afterward. Finally install patch 1.3 if you have a P5 glove.
Now you can install the football add-on if you wish.
Our last step before launching the game involves configuring the audio and video settings. This is the area that caused me the most grief. Look in your start menu for a Setup entry under the Lionhead Studios Ltd folder and launch it.
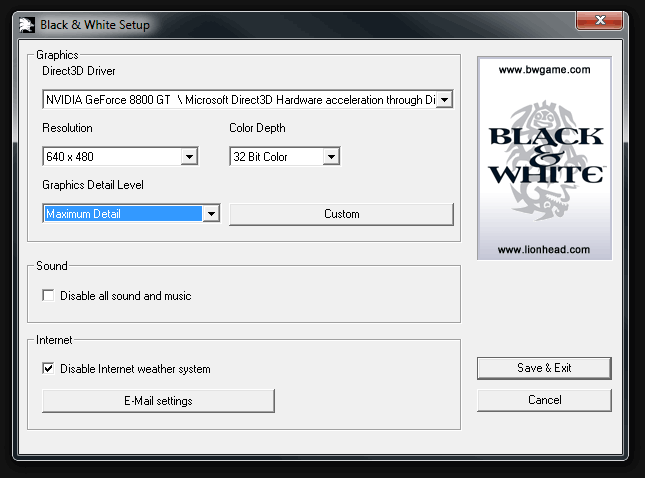
Since this game is now an astonishing eight years old, I’m sure your computer can easily handle the maximum detail that the game will allow. I selected Maximum Detail, the highest resolution available (1280×960), 32 bit color and fired up the game. Much to my disbelief, the game was getting less than five FPS and was flickering horribly! Not only that, but I was unable to use the menu system to exit the game. Once I alt-tabbed out of the game, it crashed.
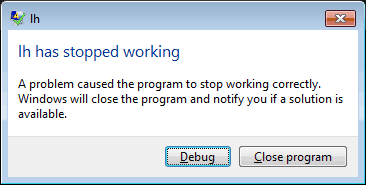
I set the next lowest detail level and tried again and experienced the exact same problem. In fact, the only setting that gave an acceptable game experience was minimum detail. Are you kidding me? That’s unacceptable for an eight year old game! Luckily, you can get around this problem by using the Custom video settings.
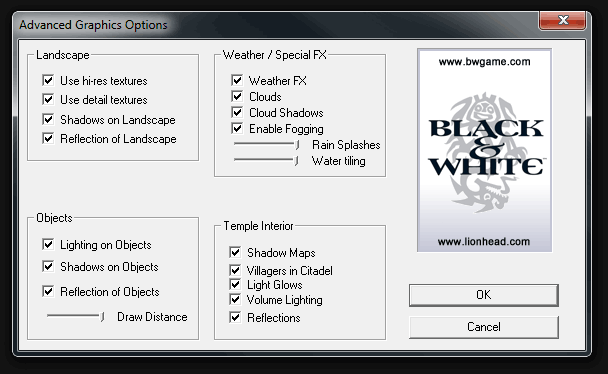
In fact, I enabled every single setting on this screen (exactly as shown) and got silky smooth frame rates. I have no idea what the setup program is setting when it uses maximum detail, but if you use custom instead it seems to work great.
For the icing on the cake, this game is capable of widescreen resolutions outside of those shown in the setup program. Bust out regedit again and navigate to this key:
HKEY_CURRENT_USER\Software\Lionhead Studios Ltd\Black & White\BWSetup
Look for two DWORD values in this key called ScreenH and ScreenW which correlate to screen height and screen width respectively.
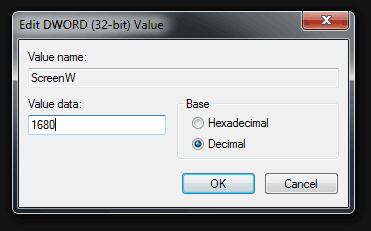
Make sure you select the Decimal radio button for the base and enter your desired screen width and height in each DWORD. I’m using 1680×1050. For the full report on widescreen support, check out the Black & White wiki page on widescreengamingforum.com.
If you still have trouble with Black & White, check out the official forums hosted by Lionhead. Good luck!

 If you have been playing